If you are going through this article, you are presumably familiar with Kubernetes and wish to interact with a Kubernetes cluster. Be it anyway you have provisioned the cluster, the standard command line employed to communicate with it is kubectl. This article expects that you have the fundamental understanding of Kubernetes and the kubectl commands.
Kubectl provides three techniques:
The technique of “Imperative commands” directly expresses Kubernetes what operation to execute on which objects, for instance: kubectl delete service or kubectl create pod.
The technique of “Imperative Object Configuration” is like the first one, except that it functions on manifest files instead of objects directly, for instance, kubectl create -f manifest.yaml.
The technique of “Declarative Object Configuration” takes manifest files as input but utilises an “upsert” logic and develops objects if they don’t exist, or it revises prevailing objects that differ from the specifications in the input manifest files. kubectl apply -f manifest.yaml is the command for this technique.
It is to be noted that a proper declarative approach does not exist yet as kubectl can’t auto-delete objects. The “–prune” option for the “kubectl apply” command lets you to attain a fully declarative approach, but currently, this option is in alpha at the time of this writing and therefore it is not deemed good enough for general use. Before diving into the code, it is important to note a few things.
Confused about your next job?
In 3 simple steps you can find your personalised career roadmap in Software development for FREE
They usually regard the object notation as an object type, followed by a slash, then the object name. For instance, the notation will be “pods/mypod” to address the “mypod” pod. A few commands receive different notations (e.g., “kubectl get pod mypod”), hence you might observe different notations utilised throughout this article.
What is Kubernetes?
A fully resource-centered system, Kubernetes provides an internal state of resources, and every Kubernetes operations are CRUD operation on these resources. You can fully manage Kubernetes by handling these resources, and Kubernetes determines what to do based on the present state of resources. For this purpose, we organize the Kubernetes API reference as a list of resource types, along with their associated operations.
Let’s take an example into consideration.
Assume that you want to build a ReplicaSet resource. To accomplish so, you would determine the ReplicaSet in a file named replicaset.yaml file, and then pass the following command:
Certainly, this builds your ReplicaSet in Kubernetes. But what goes on behind the scenes?
Kubernetes includes a create ReplicaSet operation, and like other Kubernetes’ operations, it is brought to light as an API endpoint. The exact API endpoint for this operation is:
POST /apis/apps/v1/namespaces/{namespace}/replicasets
You can locate the API endpoints of all Kubernetes’ operations in the API reference, comprising the above mentioned endpoint. To create a definite request to an endpoint, you require to pre-pend the URL of the API server to the endpoint paths that are mentioned in the API reference.
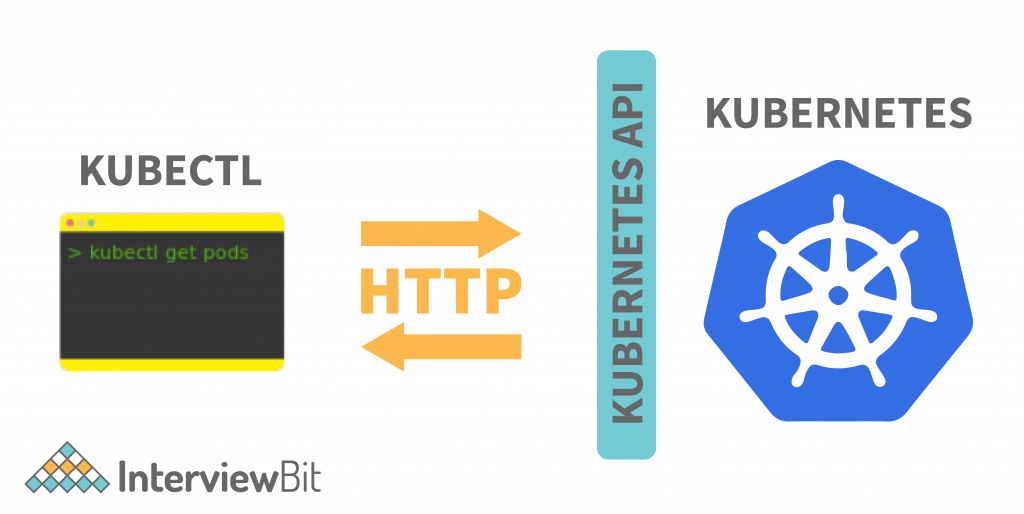
When you run the above command, kubectl initiates an HTTP POST request to the above API endpoint. The ReplicaSet definition (which you added in the replicaset.yaml file) is passed in the request’s body. This is how kubectl functions for all commands that connect with the Kubernetes cluster. In all these instances, kubectl only makes HTTP requests to the relevant Kubernetes API endpoints. Note that it’s entirely possible to control Kubernetes with a tool such as curl by manually issuing HTTP requests to the Kubernetes API. Kubectl simply makes it simpler for you to utilise the Kubernetes API. These are the fundamentals of what kubectl is and how it works.
Kubectl Commands
The kubectl command-line utility is a mighty tool, and let’s go through the basic kubectl commands that apply to all Kubernetes objects.
1. Cluster Management
A Kubernetes cluster is a collection of nodes that execute containerized applications. It lets containers run across several machines and environments: cloud-based, virtual, on-premises and physical. Listed below are the kubectl commands can be utilised to manage a cluster.
kubectl cluster-info Display endpoint information regarding the services and master in the cluster
kubectl version Show the Kubernetes version functioning on the client and server
kubectl config view Get the configuration of the cluster
kubectl api-resources Make a list of the available API resources
kubectl api-versions Make a list of the available API versions
kubectl get namespace <namespace_name> List one or more namespaces
kubectl describe namespace <namespace_name> Show the detailed condition of one or more namespace
kubectl delete namespace <namespace_name> Delete a namespace
kubectl edit namespace <namespace_name> Edit and modify the namespace’s definition
kubectl top namespace <namespace_name> Display Resource (CPU/Memory/Storage) usage for a namespace
3. Node operations
A Node is a worker machine in Kubernetes and can either be a virtual or a physical machine, which depends on the cluster. Every Node is handled by the control plane. A Node can contain several pods, and the Kubernetes control plane handles scheduling the pods automatically across the Nodes in the cluster. Following commands can be utilised for Node Operations.
kubectl taint node <node_name> Revise the taints on one or more nodes
kubectl get node List one or more nodes
kubectl delete node <node_name> Delete a node or multiple nodes
kubectl top node Display Resource usage (CPU/Memory/Storage) for nodes
kubectl describe nodes | grep Allocated -A 5 Resource allocation per node
kubectl get pods -o wide | grep <node_name> Pods running on a node
kubectl annotate node <node_name> Annotate a node
kubectl cordon node <node_name> Mark a node as unschedulable
kubectl uncordon node <node_name> Mark node as schedulable
kubectl drain node <node_name> Drain a node in preparation for maintenance
kubectl label node Add the labels of one or more nodes
4. Listing Resources
Kubernets resources also regarded as Kubernetes objects related to a certain namespace, you can either utilise individual kubectl get command to jot down every resource one by one, or you can jot down all the resources in a Kubernetes namespace by executing a single command. Mentioned below are the list of commands to get the resources information.
kubectl get namespaces Create a plain-text list of all namespaces
kubectl get pods Create a plain-text list of all pods
kubectl get pods -o wide Create a comprehensive plain-text list of all pods
kubectl get pods–field-selector=spec. nodeName=[server-name] Create a list of all pods functioning on a certain node server
kubectl get replicationcontroller [replication-controller-name] In plain text, make a lst a specific replication controller
kubectl get replicationcontroller, services Generate a plain-text list of all replication services and controllers
5. Daemonsets
A Daemonset assures that some or all Nodes run a copy of a Pod. As nodes are incorporated to the cluster, Pods are implemented to them. As nodes are erased from the cluster, those Pods are garbage collected. Erasing a DaemonSet will clean up the Pods it created.
kubectl get daemonset List one or more daemonsets
kubectl edit daemonset <daemonset_name> Edit and modify the definition of one or more daemonset
kubectl delete daemonset <daemonset_name> Delete a daemonset
kubectl create daemonset <daemonset_name> Create a new daemonset
kubectl rollout daemonset Manage the rollout of a daemonset
kubectl describe ds <daemonset_name> -n <namespace_name> Show the comprehensive state of daemonsets within a namespace
6. Events
Shortcode = ev Kubernetes events are objects that displays what is happening within a cluster, like what decisions were implemented by the scheduler or why some pods were erased from the node. Events are the first thing to look at for application, along with infrastructure operations when something is not functioning as anticipated. Mentioned below are the kubectl commands to get the events.
kubectl get events List current events for all resources in the system
kubectl get events –field-selector type=Warning List Warnings only
kubectl get events –field-selector involvedObject.kind!=Pod List events but exclude Pod events
kubectl get events –field-selector involvedObject.kind=Node, involvedObject.name=<node_name> Pull events for a single node with a distinct name
kubectl get events –field-selector type!=Normal From a list of events, filter out normal events
7. Logs
You can use Kubernets logs commands to monitor, log and debug the pods
kubectl logs <pod_name> Print the logs for a pod
kubectl logs –since=1h <pod_name> Print the logs for a pod for the last hour
kubectl logs –tail=20 <pod_name> Get the current 20 lines of logs
kubectl logs -f <service_name> [-c <$container>] Get logs from a service and choose which container optionally
kubectl logs -f <pod_name> Adhere to new logs and print the logs for a pod
kubectl logs -c <container_name> <pod_name> For a container in a pod, Print the logs
kubectl logs <pod_name> pod.log Output the logs for a pod into a ‘pod.log’ file
kubectl logs –previous <pod_name> View the logs for the last failed pod
8. Deployments
Shortcode = deploy.
A Kubernetes Deployment is utilised to inform Kubernetes how to design or change instances of the pods that hold a containerized application. Deployments can enhance the number of replica pods, enable rollout of revised code in a controlled way, or roll back to an earlier deployment version if required.
kubectl get deployment List one or more deployments
kubectl describe deployment <deployment_name> Show the in-depth state of one or more deployments
kubectl edit deployment <deployment_name> Edit and revise the definition of one or more deployment on the server
kubectl create deployment <deployment_name> Generate one a new deployment
kubectl rollout status deployment <deployment_name> Check the rollout status of a deployment
9. Replication Controllers
Shortcode = rc
kubectl get rc Make a list of the replication controllers
kubectl get rc –namespace=”<namespace_name>” Make a list of the replication controllers by namespace
10. ReplicaSets
Shortcode = rs
kubectl get replicasets List ReplicaSets
kubectl describe replicasets <replicaset_name> Show the detailed state of one or more ReplicaSets
kubectl scale –replicas=[x] Scale a ReplicaSet
11. Secrets
A Kubernets Secret is an object that comprises minor portion of sensitive data like a token, a key or password.. Such data might otherwise be inserted in an image or in a Pod specification. Users can build Secrets and the system also generates a few Secrets with the help of the following kubectl commands.
kubectl create secret Create a secret
kubectl get secrets List secrets
kubectl describe secrets List details about secrets
kubectldelete secret <secret_name> Delete a secret
12. Services and Service Accounts:
A Kubernetes service is a logical abstraction for a deployed group of pods in a cluster (which all perform the same function) and Service accounts are used to provide an identity for pods. Pods that want to interact with the API server will authenticate with a particular service account.
kubectl get services Make a list of one or more services
kubectl describe services Show the detailed state of a service
kubectl expose deployment [deployment_name] Reveal a replication controller, service, deployment or pod as a new Kubernetes service
kubectl edit services Edit and modify the definition of one or more services
kubectl get serviceaccounts List service accounts
kubectl describe serviceaccounts Show the in-depth state of one or more service accounts
kubectl replace serviceaccount Replace a service account
kubectl delete serviceaccount <service_account_name> Delete a service account
Kubectl Syntax
Kubectl commands adhere to syntax or a common structure, which lets administrators to read and verify every kubectl command entered in the terminal window. There are four important parameters to each kubectl call:
kubectl <command> <type> <name> <flags>
The <command> parameter is the operation that should be executed on a resource. Kubectl backs several operations, such as describe, create, get, execute and delete.
The <type> parameter specifies the resource type, like pods, bindings, and nodes. Usually, Resource type designations make use of abbreviations to streamline the command line. For instance, the “persistentvolumeclaims” type can be shortened to “pvc.” The <type> parameter is strong, since there are several resource types, which also include namespaces, services, jobs, resource quotas, replication controllers, leases and events. Programmers and Kubernetes administrators should be acquainted with a complete list of resource types.
The <name> parameter defines the name of the resource in the environment. If we omit the name parameter, the details for all resources are returned, similarly like a wildcard argument. Also, administrators can point out multiple resource types and names in the exact command line, as mentioned below.
kubectl get pod/test-pod1 replicationcontroller/xyzcorp-rc1
Lastly, the <flags> parameter incorporates optional flags to the command line. Flags differ with the command, so not all flags are available for all commands. For instance, the -s, (one dash shorthand notation) or –server (two dashes, longhand notation) flags designate the port and address of the Kubernetes API server.
The -o or –output <flag> sends responses to a terminal window in a certain format. For instance, the -o yaml flag will output a YAML-formatted API object, whereas the -o json flag will output a JSON-formatted API object.
Kubectl Best Practices
The kubectl command-line too seeks a level of specialisation in resource types, operations, and associated syntax. Let’s look at the five considerations that cut down the chances of blunders while working with kubectl.
1. Know the defaults
A well-designed CLI will carry out the most frequently used option or path for most operations. Depending on the default when appropriate to cut down time and lessen spelling and syntax errors in long and complicated commands. In kubectl, for instance, the “get” operation offers an “all-namespaces” flag, which by default is set to false but can be true or false, hence when admins utilise a “get” operation, it will just list the requested object in the present namespace by default, instead of all namespaces. If this is the intended behavior, there is no requirement to incorporate the flag and option explicitly, which potentially lessens mistakes and oversights.
2. Implement simple aliases
Often CLIs utilise readable phrases and terms for complicated resources. Though the aim is to make command line operations, flags, and resources more human-readable, it also incorporates extreme opportunities for spelling errors, specifically where admins frequently use the long names. Using precise and effective aliases lets admins to utilise the same items having shorter designations, which are less readable but also less susceptible to errors. In kubectl, for instance, it is much easier and faster to replace the “replicationcontrollers” resource type with the “rc” alias, or the “horizontalpodautoscalers” resource type with the “hpa” alias. Be persistent with the usage of aliases, especially when several aliases are available to let the script be more readable to others.
3. Learn how to use help
Command lines can be complex to remember with complicated syntax and granular options. Administrators and programmers can readily feel overwhelmed when they design or evaluate scripts with commands that call for arcane details or are used rarely. Well-designed CLIs offer an extensive help system. To access kubectl’s help system, utillise kubectl help at the kubectl command line; help unveil the proper syntax and highlight options for sought after operations. Additionally, the ongoing version reference is promptly available with the version operation. Learn the ways to access logs for debugging and operational details. For kubectl, the logs operation reads and shows logs for a container in a pod.
4. Present output at regular intervals
Kubectl offers a way to output text to a stdout — standard output — device, including a terminal window. Incorporate output messages to highlight significant waypoints in the script if a script takes longer to perform as compared to a user expects. This can restrict users from quitting a script inappropriately as they think the script was hung.
5. Utilise the dry run for testing
With the dry run option in kubectl, the CLI can step through a script without executing none of the operations. The dry run option helps debugging and script testing. In kubectl, the run operation owns a “dry-run=true/false” flag that helps to test and evades unforeseen consequences on production systems.
Conclusion
Regarding this list, a good starting point for your Kubernetes administrative journey. These commands are comparatively easy, user-friendly, and varied on the basis of overall functionality. Hopefully, it hit on many different Kubernetes components and gave some quick management tips through kubectl. These commands are extremely powerful and are significant for team members of all skill levels.
FAQs
Q: What is Kubectl used for? Answer: Kubectl lets you run commands against Kubernetes clusters. You can make use of kubectl to deploy applications, inspect and handle cluster resources, and view logs.
Q: What are the features of Kubectl? Answer:
We know kubectl as the swiss army knife of container management and orchestration
It is a is a huge CLI that runs commands against the Kubernetes cluster and manages the cluster manager
kubectl makes this process more seamless and straightforward
kubectl lets users to design, supervise, update, and delete Kubernetes objects
Each Kubernetes command has an API
Q: How does kubectl command work? Answer: Kubectl, the command-line tool is used to run commands against Kubernetes clusters. It accomplishes this by authenticating with the Master Node of your cluster and making API calls to perform a variety of management actions.
Get link
Facebook
X
Pinterest
Email
Other Apps
Get link
Facebook
X
Pinterest
Email
Other Apps
Comments
Popular posts from this blog
How to Zip and Unzip file & folders in Termux 🤐📁 Ashutosh Raghav January 20, 2023 Hey Guys, It's me Ashutosh Raghav 🙋🏻♂️, Termux is a terminal emulator that has the ability to do a lot of advance level things but, these things can only be done when you know basic things like, installing packages and downloading files inside the termux using command line and knowing how to zip and unzip the files. since compression is one of the most common things that we see on the internet while working on any kind of project I think we all should know how to zip or unzip any files. This is just a termux-basics post but it is as important as using advance level termux tools so make sure you learn it well and become a successful ethical hacker or at least a good Termux user. 🖥💻 What is the need for Zip and Unzip in Termux? While working with files inside termux or on any other co...
Introduction Overview The OpenAI API can be applied to virtually any task that involves understanding or generating natural language or code. We offer a spectrum of models with different levels of power suitable for different tasks, as well as the ability to fine-tune your own custom models. These models can be used for everything from content generation to semantic search and classification. Key concepts We recommend completing our quickstart tutorial to get acquainted with key concepts through a hands-on, interactive example. Quickstart tutorial Learn by building a quick sample application Prompts and completions The completions endpoint is at the center of our API. It provides a simple interface to our models that is extremely flexible and powerful. You input some text as a prompt , and the model will generate a text completion that attempts to match whatever context or pattern you gave it. For example, if you give the API ...
What Is Python Used For? A Beginner’s Guide Written by Ashutosh • Updated on Jan 26 , 2023 Share Python has become one of the most popular programming languages in the world in recent years. It's used in everything from machine learning to building websites and software testing. It can be used by developers and non-developers a like. Python, one of the most popular programming languages in the world, has created everything from Netflix’s recommendation algorithm to the software that controls self-driving cars. Python is a general-purpose language, which means it’s designed to be used in a range of applications, including data science , software and web development , automation , and generally getting stuff done. Let’s take a closer look at what Python is, what it can do, and how you can start learning it. What is Python? Python is a computer programming language often used to build websites and software, automate tasks, and conduct data analysis. Python is ...

Comments
Post a Comment